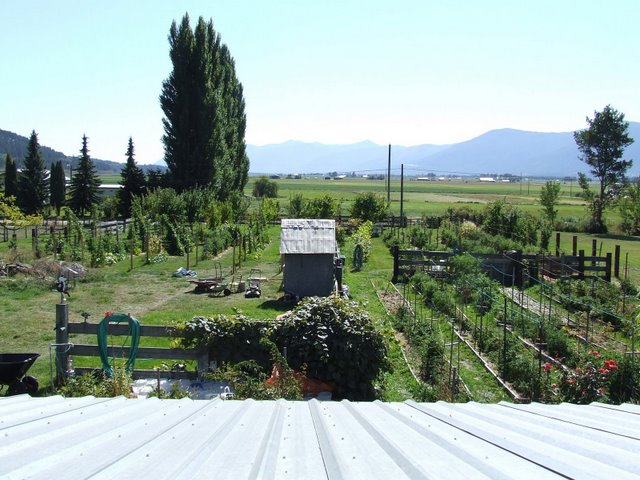
About Grunt and Grungy ...
Between the two of us we had over a hundred years of experience gardening. (Now that makes me feel old.) We had gardened in climates that can be described as West Coast Marine, to Sub Arctic wilderness, to flat prairie and finally settled in what we commonly refer to as our little piece of paradise, here in the Creston valley, in south eastern B.C., Canada, located about 10 km. north of the Idaho panhandle and just below Kootenay Lake.
The property lies in a small microclimate that gives us a zone 5/6 Canadian version or 6/7 US version.
We were avid gardeners for years, and about 10 years ago noticed that more and more of the old varieties of vegetables were no longer being offered. Being raised in the generation that thought "if you aren't part of the solution, then you are part of the problem", we decided to start growing heirloom and open pollinated varieties of vegetables (especially tomatoes) and offering the seeds to other gardeners.
Well one thing lead to another and we ended up starting a private seed bank so that our and your grandchildren will be able to have the same tastes that you are having now. This past couple of years we had gone past tomatoes and started seed banking (cold and cool storage) any annual vegetable seed.
If you have questions or would like to contribute to this blog, please feel free to contact me at any time.
Also for those who wish to trade please contact me at the below e-mail address and I will get back to as soon as possible. Thank you.
Cheers,
Grunt
grungysgarden@gmail.com
Disclaimer
What I post about ways, methods, and results is based on what I observe in my garden. Your growing conditions may achieve results that differ from mine. I am putting this blog here to offer a site to exchange gardening ideas and methods, and to exchange seeds.I welcome questions and discussions about anything gardening. The only dumb questions are the ones you don't ask. I will try to find answers for questions that I can't answer, and may post links to sites that have clearer answers than I can come up with.
Seeds
I do have tomato seeds to offer. The seeds are free, but I ask you to help cover the postage and handling in one form or another.They can be obtained through trading seeds, or paying for postage at the rate of $2.00 for the first ten varieties or seed packs, and an increase of $1.00 for every ten varieties or seed packs beyond that. Seed packs are approximately 25 seeds each (not counted, just a pinch of seeds). Germination rate usually exceeds that of commercial seed packs. If you have problems with germination, let me know, and I will replace the seeds, either with more of the same variety, or with a variety that I think will give you something similar to what the original variety would have. Please note. I am not a seed company. Iwill only offer seeds from my current trade lists and also if I have lots to spare from previous years. I don't check germination on older seeds, but my experience has been over 80% on five year old seed.
2010 FALL SEED LIST = http://tinyurl.com/4whnxy3 Some seeds from this list may be in limited supply, but I will do my best to fill your request.
Albums containing photos of most of the varieties I have, and other photos that may be of interest, can be found at:
http://www.picasaweb.google.com/tvgrunt, or
http://www.picasaweb.google.com/danvaltrial
When you have made up your list, send me a copy at grungysgarden@gmail.com
Changes ...
Seed saving and trading/sharing will also continue. I still want to bank seeds, not just of tomatoes, but I am older than the lead photo on the blog would indicate, and have passed the seed bank on to younger hands.
In the meantime, I will continue to pay it forward, and trade/share seed to all corners of the world, as I did with Val.
This poem, which we both have known since the 1960's gave us much comfort through Val's battle with cancer.
Desiderata
Go placidly amid the noise and haste,
and remember what peace there may be in silence.
As far as possible without surrender
be on good terms with all persons.
Speak your truth quietly and clearly;
and listen to others,
even the dull and the ignorant;
they too have their story.
Avoid loud and aggressive persons,
they are vexations to the spirit.
If you compare yourself with others,
you may become vain and bitter;
for always there will be greater and lesser persons than yourself.
Enjoy your achievements as well as your plans.
Keep interested in your own career, however humble;
it is a real possession in the changing fortunes of time.
Exercise caution in your business affairs;
for the world is full of trickery.
But let this not blind you to what virtue there is;
many persons strive for high ideals;
and everywhere life is full of heroism.
Be yourself.
Especially, do not feign affection.
Neither be cynical about love;
for in the face of all aridity and disenchantment
it is as perennial as the grass.
Take kindly the counsel of the years,
gracefully surrendering the things of youth.
Nurture strength of spirit to shield you in sudden misfortune.
But do not distress yourself with dark imaginings.
Many fears are born of fatigue and loneliness.
Beyond a wholesome discipline,
be gentle with yourself.
You are a child of the universe,
no less than the trees and the stars;
you have a right to be here.
And whether or not it is clear to you,
no doubt the universe is unfolding as it should.
Therefore be at peace with God,
whatever you conceive Him to be,
and whatever your labors and aspirations,
in the noisy confusion of life keep peace with your soul.
With all its sham, drudgery, and broken dreams,
it is still a beautiful world.
Be cheerful.
Strive to be happy.
Max Ehrmann, Desiderata, Copyright 1952.
Life comes with no guarantee of quality or quantity. It is up to you to remember to smell the flowers, watch the sunset, hear the birdsong in early morning, and the spring frogs in the evening. What ever happens in your little corner of it, it is still a beautiful world, and you do yourself a great disservice if you fail to see and celebrate what is there.
Grunt
Sunday, February 15, 2009
Soil Preparation - Part 7 (or Gardening Tools Part 4)
10. A good garden rake. While working in the garden I use the straight headed rake with short (about 2" long), slightly curved teeth that is roughly16" wide. It allows the gardener to rake the soil smooth and level, or if need be turn it over so the teeth point upwards, and push dirt around for small hilling jobs.
Later on, in this blog, I will continue discussing more tools and accessories that I have or would love to have to make gardening that much more enjoyable, but these first 10 I would consider the basic gardening kit.
Once you soil has been turned, amended with the first basic amendments, I would suggest that you have your soil checked for pH and low or missing elements. There are soil testing labs which will do either a minor or major analysis and most will give you recommendations on what is lacking and what you will have to add. There are organic (my preference) or chemical additives that you can use to bring up the elements (both trace and major) up to ideal. I would repeat testing every 5 years or so just to make sure that everything is at an ideal range.
To help keep your garden up to snuff, remember to mulch everything well with lawn clippings, leaves, and yes pulled weeds that are tossed on top of the mulch so that their roots dry out and they die. The plants will love you as it provides shade on their roots in the heat of the summer, and between natural breakdown of plant material and worm activity you are providing nutrients and humus to your soil. Also with a good mulch cap, it will help hold in moisture, and the weeds are kept down. (This is an added bonus for those gardeners of us who really don't care for weeding.) In the fall turn all your mulch under, so that it can continue breaking down and feeding the worms overwinter. To get a jump on the following spring, put a new layer of mulch on your garden as it will help prevent your soil from freezing and prolong your worm activity. Come early spring take your rake, and pull the new mulch back to allow the soil to warm up. After you plant or transplant you can pull the mulch back around the seedlings and plants, and have a jump on weed prevention. We mulch every chance we get, as the old mulch breaks down from underneath, new mulch is added to the top. When we can achieve it we have a mulch cap that can be 4" deep.
One of the frequent questions we are asked is "Doesn't that add more weed seeds to your garden?" The very short answer is - Yes, but if you mulch every year and prevent them from growing, it doesn't make a difference. Eventually the seeds die and add to the humus content and if the weeds are mulched they can't grow and take over the garden. I would call this a win-win solution.
Thursday, February 12, 2009
Soil Preparation - Part 6 (or Gardening Tools Part 3)
Just a couple more items that I find handy and then I promise I will get back to dealing with the soil preparation itself.
9. a multi marking dibble stick. Basically this is a make it yourself tool. You will need a couple of 1" X 2" boards 2' to 3' long, some 3/8" doweling, a drill with a 3/8" bit, a saw to cut the dowelling in 2 inch pieces, some wood glue and 3 or 4 - 1 1/4" wood screws. Take one of you boards and mark it at 1" intervals, then draw a center line along the long way of the board. You should have a series of crosses all the way along the board (like ++++). On each cross, drill a 3/8" hole. Now take your dowelling and cut it into 2" pieces. Lay you drilled board on a solid flat surface, and then, one at a time, wipe a little glue around one end of your dowel, and insert it into a hole in the board, pushing it firmly enough that it ended up flush with the back of the board. Once you have filled each of the holes with a dowel "tooth", turn you board on it's side over night to let the glue dry well. Looking down at while it is on it's side it should look like a short toothed comb. Next morning, put the toothed board on top of the second board and using wood screws, firmly attach it together. The second board acts as a stopper to prevent the dowel from pushing upwards and out of the top of your dibble stick. The multidibble stick can then be used in the garden to mark where your seeds go, as well as make a hole to plant the seed into.
Meanwhile back at soil preparation. The heaviest part of the work is behind you now, if you have your long rows of bare, turned earth, with the amendments added.
Your back is aching, your hands are blistered, and by now you are wondering if it is all worth while. But your transplants are up and healthy and looking for a new home where their roots can roam. Now is definitely time to start "hardening" them off. For the first couple of days, bring them outside after 3pm and allow them a couple of hours of daylight when it is warmest. Then for another 2-3 days bring them out in the morning, but provide them light shade from 11 AM-3 as they are not quite use to full sunlight and you want avoid sunscalding. After 5 or 6 days they can remain outside all day. But you have to make sure to keep them moist as they will be transpiring very heavily. After a week to ten days they are ready to transplant into your new beautiful garden.
While you are waiting for transplanting, you can now plant the rest of your garden according to the seed requirements. Beans, carrots, beets can be directly seed, into the soil, using your multdibble stick. We put a couple of carrot seeds into each hole. Beets are planted 1 per hole. Peas are every other hole. Beans go into every 3rd or 4th hole. Once the seed is dropped into the holes, turn your dribble stick over and gently scrape the dirt back and forth over the holes to fill with soil and very lightly tamp the surface once to settle the soil around the seed. After you get finished planting the seeds, use a watering can, or your drip hose or even a sprinkler hose set on gentle spray, to throughly water the ground to a depth of at least 3 inches to give the seed enough moisture to start growing.
Tomorrow we will deal with transplanting your seedlings.
Tuesday, February 10, 2009
Soil Preparation - Part 5
7. Hoses - needed to move water first from your source and secondly to water you plants. Make sure you have a good quality hose that is long enough to reach all of your garden area. If you can afford it, snap off/snap on couplings come in real handy.
8. Watering hoses - Very few plants really like getting their heads wet and so my advice is to consider drip irrigation. It will reduce a lot of disease problems and it doesn't have to be expensive. Find a couple of old garden hoses that shall we say are past their better days and leak some. Take the leakest 1 and cut it into 1" - 1 2/2" (these become the dripper end caps of you emitters and prevent the water washing out the soil around you plants root ball), and next purchase (this is the most expensive part) a couple of hundred feet of micro tubing (1/8" diameter or smaller, some are actually sold as gallons per hour and if you have this type I would suggest using the 2 gallon rather than the 1 gallon type as it doesn't plug up as easy), plus an end cap for you better hose. Cut the microtubing at a 45 degree angle into pieces approximately 8"- 1' long. Make your self an awl out a regular 2 1/2" nail driven through a small piece of wood (you can shape it fit your hand comfortably) and puncture a piece of the dripper end cap in the center. Take care not to push the awl all the way through the piece of hose, only one side so that the microtubing end is inside the cap. As you with draw the awl, force one of the precut pieces of microtubing into the opening. The hose should shrink back around the microtubing and form a tight fit. Do this for all the pieces you have cut into sections. Now take the second hose and pierce it at roughly 8" or 9" intervals, (again only through one side and not right out the other side of the hose) . As you make the holes, insert a capped piece of microtubing in each one. When you get done you will have a hose that you can lay along the base of you row and water the plants from the bottom. Since we use raised beds we place one of these hoses along the base of the plants when we transplant in the spring, it stays there all summer and then we raise it off the ground when we turn the garden in the fall. If you aren't set up the way we are, just roll it up in the fall and lay it back out in the spring. An even cheaper way of doing a large area is to use 3/4" plastic piping that you can purchase in 100 foot rolls (or longer) and cut to length.
We will continue with tools and accessories tomorrow.
Monday, February 9, 2009
Soil Preparation - Part 4
1. Spading or Digging Fork - This fork has 4 prongs, that are roughly 1/2" - 3/4" wide by 1/4"- 3/8" thick and roughly 8-10" long. In my opinion the thicker and longer the prongs, the better. Also make sure that you get one with a sturdy handle (I prefer a metal one) that is topped with a D. This is one of the two "work horses" use around our place. I use it to bust up new soil, and turn the beds spring (lightly) and fall (deep turning working the mulch into the soil for more humus). It is also very good for lifting out plants after you have sliced around them with a shovel or spade.
2. Border shovel - This is useful for cutting tough turf, and other odd jobs such breaking up matted compost and manure. I cannot stress enough to get your tools with the best metal and handles you can afford. Especially if most of your gardening will be done by hand or you are doing large areas. It will pay for itself in the long run, especially if you take care of them properly.
3. Digging Spade - This is another of the garden "work horses". As the name implies, it is used to dig in your garden. Especially if you are doing a deep or double digging job. You will find it handy when loading or unload you compost or manure to move it to where it will do the most good.
4.Hoes - For those of you who do not used raised bed gardening, a good hoe is essential. My personal preference is a Draw Hoe, as it can be used for multi tasks. Weeding, hilling, soil movement and chopping, all come to mind as I picture this variety of hoe in action.
5. For those of you who used the raised bed method of gardening, I would suggest a Hand Mattock, with the hoe blade on one side and cultivator on the other. (By now you probably have gathered that raised beds are usually more hands on, with out the massive back aches of a flat garden, but we won't go in to the pros and cons of the two types of gardens here at this time.)
6. A bale of binder twine or heavy twine of some type. This will be used in a variety of places.
Marking straight rows. (Cut the twine to the length of your rows plus a foot. Tie a sharpened stake at each end and then shove one end at the beginning of your row, walk out to the end of your row. Wrap excess string around second stake and embed. Take you hoe or a marking stick and slide it along the taunt string and voila - a straight row is marked.)
Tying up plants or securing them to supports.
Using as supports for bean poles - One center pole with strings run down from the top and spaced 18" to 3' in diameter and pegged at that distance, will make a lovely bean pole teepee.
Making bundles of plant material easy to transport to compost bins.
I am sure once you put your mind to it you can find a hundred and one things to do with twine. (And if you do please either leave a comment or contact me at grungysgarden@gmail.com as I would love to do a blog post of what can be done with twine later on this summer. Thank you in advance.)
This post is getting long and I will continue it tomorrow under Soil Preparation - Part 5.
Saturday, February 7, 2009
Soil Preparation - Part 3
First locate where you would like your squash/melons to go. You should allow at least 8 feet for vining varieties and 3 feet for bush types, between each "hill"or section. Take your spade or shovel and slice and cross slice an area about 36" X 24" rectangle at the center of the section. (Please remember we are working towards 3' wide beds.) Pull out the sod and knock off as much dirt as easily possible. (You can add this turf to your growing pile of composting material we discussed in Soil Preparation # 1.) Dig the soil well with your spading fork(at least 14 " deep) and remove any stones and rubbish. Now is the time to incorporate soil enrichments as melons and squash are heavy feeders. Use 4-6" compost, or well rotted manure plus 2 Tablespoons of Epsom Salts, and a handful of bone meal. If you soil is already on the acidic side, up to a teaspoon of lime, can be added. Good general garden soil has a pH of 6.5 - 6.8, although plants can grown in soil slight on either side of this pH range. Since you have added bulk and "fluffed" the soil, water it and let it set for a couple of days to settle back down as far as possible. You will still probably have a small mound or "hill", which is what you want.
In a short growing season, start your melons/squash in paper pots (1 seed per pot and 3/4"-1" deep) in a heated "greenhouse" up to 3 weeks before the soil is warm enough. (I usually figure about a week before the last frost is due in my area.) For those of you who are blessed with a longer and warmer growing season, you will be able to plant directly in the "hill".
Assuming that it is warm enough, now it is time to plant your melon and squash. Again plant at the 3/4"-1" depth, if direct seeding. If you are transplanting by the paper pot method, tear off the excess "collar" of paper, dig you hole at the depth of the pot and gently (REMEMBER: squash and melons do NOT like their roots disturbed) transplant into the hole, mounding the soil slightly over the soil of the pot. Plant 3 plants to a hill in a triangle shape about a foot apart from each other. Water them in well and keep the soil moist. At planting time, since there are many insects that love to eat fresh growing tips of both squash and melons, we cut the bottom out of 1 gallon milk jugs and a hole in the cap (leaving a 1/8" rim on the cap), place them over the seedlings and bury the bottom of the jug about 1/2" into the soil, run a stick through the mouth of the jug into the soil, then take a piece of tulle or remay put over the top of the stick and milk jug and secure with the cap. This allows the excess heat to escape and prevents the wind from blowing your milk jugs away.
Break out the mower and again mow the intervening strips of grass (both between the rectangles and the pathways) as short as possible. Cover with 2 or 3 layers of cardboard and the put mulch 2-3" deep over the top of the cardboard. Water the mulch well to cause it to cake up and form a cap over the cardboard and help exclude any sunlight.
Done the way described above, you can plant your squash and melons with only a 3' pathway between beds. Again you can mow the grass strip in between beds, cover with cardboard and mulch with grass clippings, hay or even sawdust to help kill back the grass and weeds under you cardboard, and by fall you will have a much easier time of turning those pathways into gardens.
An addition tip here. If you are using sawdust on your pathway. Sprinkle it liberally with high nitrogen fertilizer (the first number of the 3 that is on the bag label), as it will help break down the sawdust into rich compost. Do this once a month all summer.
Now that your squash and melons have taken off and are filling the milk jugs full of lovely green leaves, it is time to let your "babies" face the world. Carefully remove the jugs (and store for next year). When the plants start putting out runners (on vining types) or you see the first flower bud on bush types, top dress you "hills" with another inch or so of manure or compose. If you are unfortunate not to have either available, then sprinkle a small handful of slow release fertilizer around the plants on your hill, remembering both types are very heavy feeders.
A couple of notes here.
Squash and melons of the same family cross readily so if you have more than one variety, and want to keep your seed "pure" you will have to bag both male and female blossoms and do the pollination yourself. You can reduce the chance of cross pollination, by also planting different families together in your rows. ie a Pepo type and Maxima type of squash should not give any viable seeds.
Happy growing and keep your eyes out for squash bugs. We are blessed that they aren't around here. But if you live in an area where they exist, a suggestion would be to make hoop houses down your rows and cover your melons and squash with floating row cover that is pinned down on all sides.
Friday, February 6, 2009
Soil Preparation - Part 2
If you have fresh lawn or pasture that is going to be turned in to a garden, the following tip will interest you. It really is killing two birds with one stone.
First mow your grassy patch as short as you can. Then take a shovel or mattock or Portuguese Hoe, and and literally rip a strip back about 2 inches thick and 4-6" wide and long, for each hill you wish to plant. Place your seed potato on the bared earth and push the strip back over the potato, upside down. Now mulch the sod well at least a foot and a half on both sides and between each plant, leaving a small opening, where you first entered the sod. The potato will push it's first sprout out here. Water the area well, and allow Mother Nature to take her course. Plant the potatoes about a foot to 16 inches apart in your rows. Keep the soil moist and once the sprouts are up and reaching for daylight, keep adding mulch a little at a time until you have a reasonably thick mat that is 4"-6" thick.
Keep adding mulch as needed, as a lot of the potatoes will be formed on the surface of the turf, and can still be sunburned through light mulch. Once the potato vines have bloomed and started to die back, comes the time to dig them. Pull back the mulch and starting at least a foot and a half on either side of where the sprouts emerged, use your spade or digging fork, proceed to dig your potatoes. Do not be surprised at the size of the spuds. We grew one that fed a family of 4, two meals. But be careful as there may be lots of potatoes under each plant and most will be large and easy to spear or slice.
The advantages are that you get your first crop without the digging and prep work, you kill back the grass in the sod, and as you dig the potatoes you are preparing your land for next year's garden.
Happy planting.
Wednesday, February 4, 2009
Soil Preparation - Part 1
First select a site that gets at least 6 or more hours of sunlight with in reasonable distance of your taps. Lay out where you want you rows to go and how long. I would suggest 10 to 3o feet as a reasonable row size. You will want to be able to plant enough of any type of vegetable to feed your family. This first year will be the hardest, especially if you are doing it by hand rather than having a rototiller do the initial turn over. If you have access to either a person with a tractor/rototiller (the easiest way to start) or even a heavier duty garden rototiller, then I would suggest that you work your soil completely with it and eliminate the steps that follow. If you are starting from scratch with a lawn or pasture, try and have the garden worked at least two times before planting season, about 10 days to 2 weeks apart. This will help destroy the grass and weed roots and give you a much "cleaner" soil to work with.
But getting back to the old fashioned hand turning method. As soon as the snow goes, cover your garden area with a couple of layers of cardboard, weighted down as it will help start killing off the lawn grass and weeds. Now mark out where your rows will be. Work the garden one row at a time. Lift off the cardboard about 2 feet wide for the full length of the row. Take a sharp spade and slice the grass along each edge between the cardboard layers, then cut length wise two more times so that the slices are about 6" wide. Go back and cut these slice horizontally every foot. Starting at one end of the row, lift the sod out and beat off most the soil back into the garden row. Take the turf and stack some place out of the way, upside down. Continue doing this until you have a row 2 feet wide the full length of your garden. Now get out your spading fork and break up the soil well, removing rocks and other non soil components. Sprinkle a handful of general all purpose slow release fertilizer, a couple of handfuls of epsom salts (magnesium and phosphate) and a couple of handfuls of bone meal for every 20' feet of row. Remix the soil in each bed. Now move the cardboard back another 6 inches on each side, slice and cross slice. This time you turn the sod upside down right back on the edge of your row. Pull the cardboard back over the turned over sod and mulch well (3-6") with lawn clippings and or chopped up leaves. Moisten the whole area well. Leave 3 feet between each turned over area. You can mulch these strips with lawn clippings, leaves, even sawdust. This summer, these will be your pathways. In the fall after harvest, if you have the time, You can do your pathways the same way as you did your original beds. If you are into raised beds, like we are you can shovel your new pathway beds up onto your existing new beds, take your fork and work the two layers together.
Now getting back to the turf that you have stacked up in some out of the way place. Sprinkle a couple hand of high nitrogen fertilizer over the top of the stack. Wet it well, cover with cardboard, so light can not penetrate the covering and cover with a tarp. Occasionally check to see that it is still moist (not soggy) and recover. In a year or two you will have some lovely soil which you can return to your garden beds.