About Grunt and Grungy ...

For those of you who don't know about us, a little history to fill you in.

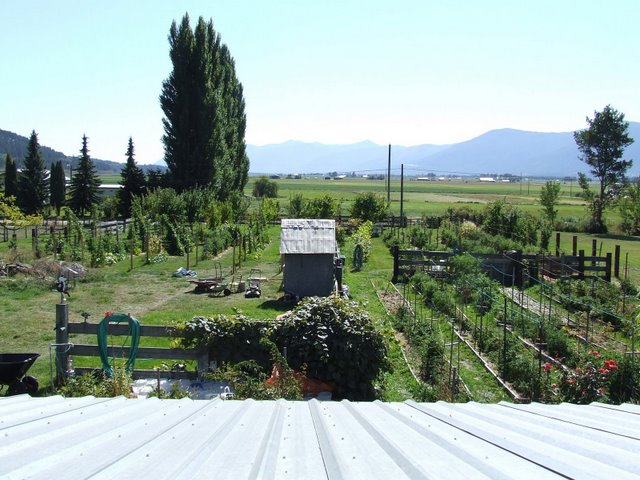
Between the two of us we had over a hundred years of experience gardening. (Now that makes me feel old.) We had gardened in climates that can be described as West Coast Marine, to Sub Arctic wilderness, to flat prairie and finally settled in what we commonly refer to as our little piece of paradise, here in the Creston valley, in south eastern B.C., Canada, located about 10 km. north of the Idaho panhandle and just below Kootenay Lake.
The property lies in a small microclimate that gives us a zone 5/6 Canadian version or 6/7 US version.
We were avid gardeners for years, and about 10 years ago noticed that more and more of the old varieties of vegetables were no longer being offered. Being raised in the generation that thought "if you aren't part of the solution, then you are part of the problem", we decided to start growing heirloom and open pollinated varieties of vegetables (especially tomatoes) and offering the seeds to other gardeners.
Well one thing lead to another and we ended up starting a private seed bank so that our and your grandchildren will be able to have the same tastes that you are having now. This past couple of years we had gone past tomatoes and started seed banking (cold and cool storage) any annual vegetable seed.
If you have questions or would like to contribute to this blog, please feel free to contact me at any time.

Also for those who wish to trade please contact me at the below e-mail address and I will get back to as soon as possible. Thank you.
Cheers,
Grunt
grungysgarden@gmail.com


I am sad to report that Dan McMurray passed away on February 15, 2012 at his home in Wynndel, British Columbia. Dan was 69 years old.

Much of the final years of Dan's journey is chronicled on this blog. He was a man who made a difference to many people, and his family believe that his thoughts in the last years and months of his life, and his work in preserving heritage seeds should remain available.

Disclaimer

What I post about ways, methods, and results is based on what I observe in my garden. Your growing conditions may achieve results that differ from mine. I am putting this blog here to offer a site to exchange gardening ideas and methods, and to exchange seeds.
I welcome questions and discussions about anything gardening. The only dumb questions are the ones you don't ask. I will try to find answers for questions that I can't answer, and may post links to sites that have clearer answers than I can come up with.

Seeds

I do have tomato seeds to offer. The seeds are free, but I ask you to help cover the postage and handling in one form or another.
They can be obtained through trading seeds, or paying for postage at the rate of $2.00 for the first ten varieties or seed packs, and an increase of $1.00 for every ten varieties or seed packs beyond that. Seed packs are approximately 25 seeds each (not counted, just a pinch of seeds). Germination rate usually exceeds that of commercial seed packs. If you have problems with germination, let me know, and I will replace the seeds, either with more of the same variety, or with a variety that I think will give you something similar to what the original variety would have. Please note. I am not a seed company. Iwill only offer seeds from my current trade lists and also if I have lots to spare from previous years. I don't check germination on older seeds, but my experience has been over 80% on five year old seed.

2010 FALL SEED LIST = http://tinyurl.com/4whnxy3 Some seeds from this list may be in limited supply, but I will do my best to fill your request.

Albums containing photos of most of the varieties I have, and other photos that may be of interest, can be found at:
http://www.picasaweb.google.com/tvgrunt, or
http://www.picasaweb.google.com/danvaltrial

When you have made up your list, send me a copy at grungysgarden@gmail.com

Changes ...

The status here has changed substantially, as you can see above. The blog will continue, hopefully with more frequent input than recently.
Seed saving and trading/sharing will also continue. I still want to bank seeds, not just of tomatoes, but I am older than the lead photo on the blog would indicate, and have passed the seed bank on to younger hands.
In the meantime, I will continue to pay it forward, and trade/share seed to all corners of the world, as I did with Val.
This poem, which we both have known since the 1960's gave us much comfort through Val's battle with cancer.

Desiderata

Go placidly amid the noise and haste,
and remember what peace there may be in silence.
As far as possible without surrender
be on good terms with all persons.
Speak your truth quietly and clearly;
and listen to others,
even the dull and the ignorant;
they too have their story.

Avoid loud and aggressive persons,
they are vexations to the spirit.
If you compare yourself with others,
you may become vain and bitter;
for always there will be greater and lesser persons than yourself.
Enjoy your achievements as well as your plans.

Keep interested in your own career, however humble;
it is a real possession in the changing fortunes of time.
Exercise caution in your business affairs;
for the world is full of trickery.
But let this not blind you to what virtue there is;
many persons strive for high ideals;
and everywhere life is full of heroism.

Be yourself.
Especially, do not feign affection.
Neither be cynical about love;
for in the face of all aridity and disenchantment
it is as perennial as the grass.

Take kindly the counsel of the years,
gracefully surrendering the things of youth.
Nurture strength of spirit to shield you in sudden misfortune.
But do not distress yourself with dark imaginings.
Many fears are born of fatigue and loneliness.
Beyond a wholesome discipline,
be gentle with yourself.

You are a child of the universe,
no less than the trees and the stars;
you have a right to be here.
And whether or not it is clear to you,
no doubt the universe is unfolding as it should.

Therefore be at peace with God,
whatever you conceive Him to be,
and whatever your labors and aspirations,
in the noisy confusion of life keep peace with your soul.

With all its sham, drudgery, and broken dreams,
it is still a beautiful world.
Be cheerful.
Strive to be happy.


Max Ehrmann, Desiderata, Copyright 1952.


Life comes with no guarantee of quality or quantity. It is up to you to remember to smell the flowers, watch the sunset, hear the birdsong in early morning, and the spring frogs in the evening. What ever happens in your little corner of it, it is still a beautiful world, and you do yourself a great disservice if you fail to see and celebrate what is there.
Grunt

A little footnote here, that will stay at the top of the blog. I have married again, for the fourth time. Another internet marriage, as Val's and mine was, and just as good, although completely different.
I was also diagnosed with lung cancer in May 2011, and started treatment to cure it in late August 2011.
The blog will carry on, in much the same vein as it always has. I will post mostly garden related articles, but also a few comments on things and life in general.
For a while, I thought Gump had it right = sh*t happens. He's wrong = LIFE happens


I am sad to report that Dan McMurray passed away on February 15, 2012 at his home in Wynndel, British Columbia. Dan was 69 years old. His family wishes his blog to remain for those who wish to read Dans' journey.
Showing posts with label Seed Saving. Show all posts

Friday, February 20, 2009

Another way of Saving Brassica seeds

Todays method is brought you by Frank Van Keirsbilck who is Orflo on Homegrown Goodness.
Thank you Frank.

Growing seeds from all sorts of brassicas, especially cabbages is something that seems to be frightening lots of people. But, this is really not necessary, if you stick to some rules, it's in fact easy to grow out seeds (if you can spare the place , of course).

Most brassicas are biennal, so this means they need two years to form seeds, there are however some noticeable exceptions: broccolis or even early cauliflowers,, rocket or aragula and a few others grow seed in one year time, some others are even triennal or perennial.

The first thing to do is to find out what variety you have (this is mostly easy, as it's written on the seed packet), and what species this variety belongs to.

The most common grown species are brassica juncea(mustard and others), brassica napus (rutabaga, rapeand others), brassica oleracea (broccoli, cauliflower, Brussels sprouts, cabbages, kales, collards, kohlrabi), brassica rapa (turnip, browwoli raap, chinese cabbage,..), crambe maritima (sea kale), eruca sativa (rocket or aragula), raphanus sativus (radish)). These species will never cross with each other, but will cross with other varieties within the species. Thus, a broccoli will not cross with a chinese cabbage or a rutabaga, for instance, but it will cross with Brussels sprouts or collards!

So it's perfectly possible to grow out one variety of each species in order to save seeds from these.

Another thing that's really important is that brassicas are outbreeders, meaning, if you have only one lonely cauliflower that's flowering, it won't set any seeds (again, there are some lesser-grown exceptions). Two plants work, but are just a very small genetic base for seed production, so grow out at least 10 plants of each variety, more is better (10 is really an absolute minimum)

So, how to start? Just start sowing seeds from the brassicas as you would do normally, plant them out and watch them grow. Whenever winter arrives (I'm talking about the most common biennal brassicas here), make a selection: take the best plants only (and keep them apart) for seed production, and eat the smaller or different shaped ones. This is important, it's a way to select better and better plants (and seeds) for the future. Have a good look at the plants, for instance:is the variety you want seeds from originally round, and are there some flatter-shaped ones in it? Select the round ones, then, unless you want to create a 'new' flatter variety (then you should select the flat-shaped ones, off course). Depending on the climate you have, and on the cold-resistance of the brassica varieties, take them to a conservation room, or leave them in the garden. Don't eat anything from the selected plants, this is better. Take a second look after the winter: did they survive easily, did they get many rotten leaves or sicknesses,... Take, again, the good-looking healthy ones and keep these, plant them out in spring if you had to place these inside. And make sure this is the only variety within the species you will re-grow... or isolate them, as described further.

Most brassicas flower very easily , one noticeable exception is cauliflower, which needs to be cut with a knife in the middle of the plants, in a sort of X-shape. After flowering and, of course pollination by insects, seeds start to form, first on the low side of the plants, and slowly this formation will creep up to the top . Build a sturdy support around the plants, the stems loaded with seeds can fall over and you could lose a lot. It takes quite a long time for seeds to start really ripening off, I never noted it exactly, but it 's at least two months in my climate. Whenever the pods start changing colour, from green to mostly brown , and start to look a bit brittle, it's time for some action. Depending on the varieties and species, pods can suddenly burst open and shatter some seeds, so when you feel they are completely dry, take them and put them in some sort of bag. Be careful , at this ripening stage, birds can cause a lot of damage, so, if necessary, cover the plants with some sort of netting. Another cause of damage are all sorts of aphids, these can easily be taken off.

It's best to leave the pods to ripen completely on the plants, brassica seeds usually don't develop further when the stems have been cut away from the plants .

The seeds, if kept and a dry and dark room, can be used for a long time, some 4-5 years, so you can build in a sort of yearly seed-growing rotation if you want to keep on sowing different varieties from your own seeds.

Off course, there are also methods for growing out two or even three brassica varieties of the same species in one year: build some isolation cages over the brassicas, each variety gets one isolation cage, let's suppose you want to grow out three brassica oleracea varietes: red cabbage, a kale variety and Brussels sprouts. So, when you have placed the cages over the selected varieties (before flowering, off course), open up on day one the cage of the red cabbage, and keep the other two closed, on day two open up the kale cage, and keept the other ones closed, and so on... This will reduce the amount of seeds somewhat, but brassicas are mostly very prolific seed producers, a harvest of one pound of seeds from 10 plants isn't exceptional, although this depends a bit on the variety.

Another method for growing out two or more seed-brassicas is having a minimum distance between the varieties. There's lots of discussion about this one, some yell out it has to be 2 miles, at least, others speak of less than half a mile. I'm pretty sure all these persons are right... So, where do all these differences come from? First of all, insect varieties, some have a wider range than others, European honey bees for example go as far as 5 miles to pollinate (this is just an indication, because these bees aren't the main pollinators for brassicas), other hover flies or mason bees or... fly only a few hundred yards away from their homes. So, that's the first difficulty, second is a sort of physical barrier: if two brassica varieties are separated from each other with a large field of wild flowers, a big hedge, a house, ... they could perfectly well produce 'true ' seeds , even if they are only 100 foot from each other! You have to search and experiment a bit...every place has its own specific circumstances, what works in one place, could fail in another...


Some brassica varieties (I'm thinking especially about mustards and Chinese cabbages here, but there are some others) have a tendency to bolt too early, without having formed a true crop. Don't use these for seed-saving, you will only select on this early-bolting characteristic, and that's really not a good thing to do, again, follow the rule: take the best varieties....

If you want to go a bit further, you could try and start creating your own brassica variety. This is infact also easily done, but it takes time. I'll illustrate this with an example:

two brassica oleracea varieties: you have a red cabbage and a savoy cabbage, and you want to create a red cabbage with the familiar curly leaves of the savoy cabbage... grow out a line of each of these two varieties, right next to each other , and select only one plant (the best looking and healthiest, off course) from each of these two varieties. So now you have two plants that are quite close to each other, so they surely will cross-pollinate. That's the first step, the second step is sowing out the produced seeds the next year, and select again on the plants you have grown out, do this for some years, and you might end up with the curly red cabbage...But this could take some patience....

Wednesday, February 18, 2009

This how to save seed from brassicas, brought to you by Tim Peters on Homegrown Goodness.

Brassica's fall into 2 major groups for seedsavers,
annuals and biennials. these 2 groups each need a different approach to seedsaving.

Annual brassica
these are those that if sown January (midwinter) onwards until late spring may go to seed. Many mustards, ch. cabbages, many broccoli, early cauliflower, oriental turnips, are in this class.

Biennials (or functionally biennial)
These are cabbages, brussel sprouts, kolhrabi, most cauliflower esp. the later ones, rutabaga, most turnips from Europe... etc. These for the most part need to be planted early enough so that when the cool and shortest days of fall start to lengthen again the flowering mechanisms are triggered. There is a fine line sometimes between being big enough and to big ...esp. if you are leaving them to the rigors of the outdoors

Since brassica are a dry seed, it is best if they mature in dry weather. From the flower bud to dry seed is anywhere from 40-60 days. Frost can kill the developing embryo in most varieties so this needs to be a frostfree time (mustards excepted). Keep this in mind and plant early enough to accomplish a warm weather flowering and a dry weather maturing. this means getting to know your varieties, and your climate. If you can not get a dry weather maturity, harvest when the pods yellow and let dry down inside... they can be hung from rafters, etc.
When the pods are dry the seed can be extracted by vigorously moving the stalks in a beating motion from side to side in a 35 gallon plastic garbage can. The material dumped onto sifting screens, and finally fan winnowed in a wheelbarrow (see my wheat threshing/seedcleaning techniques). ...Air speed on the fan will be lower than used for wheat, ...you drop the seed/trash mix and move your drop to where the seed is going into the barrow, and the trash is going over the lip onto the tarp spread under the barrow (if you have a mishap you can pick up trash and seed and re-clean). For large quantity of threshing proceed as for my wheat threshing techniques.
feel free to contact me at any time at atimberline@yahoo.com
Tim Peters


Sunday, January 25, 2009

Tips From Fellow Gardeners #3

Johno of Bishops Homegrown bring today's tip.

"For those starting tomatoes a little early, fertilizing with fish emulsion and keeping the lights on for 16+ hours a day helps keep them in the vegetative phase until transplanting."

Monday, December 15, 2008

Saving Seeds - Part Seven - Squashes, Melons.& Cucumbers

Squashes, melons, and cucumbers are commonly know as the flirts in the gardening world. They have a bad tendency to cross easily with other members of their own "families". Thank goodness it is also just as easy to prevent them from doing so. It is only a matter of carefully paying attention to you plants and watching for the female flowers to start to appear. You can tell the female flowers, by the little bulb like structure at the base of the blossom.
There are basically two methods for preventing cross pollination. The first is to bag both the female and male blossoms, and when they are both ready, quickly pick the male blossom, go to the female blossom and unbag both. Rub the pollen off the male flower unto the pistil of the female blossom, discard the male blossom, and rebag the female blossom until the flower withers and drops loose. Then you can remove the tulle bag and mark the growing fruit, for harvesting. If fertilization occurs and you are successful the bulb will start growing and become which ever fruit you have desired. Unsuccessful pollination will be indicated by the bulb (very immature fruit), turning yellow and eventually dropping off the vine.
The second method is to use tape. (I prefer the 30 day masking tape as it isn't quite as sticky and therefore allows me easier peeling while I work.) When you notice the female blossoms first appearing gently tape the upper end of the blossom closed and tape several male blossoms (again at the tip, to prevent the blossom from opening and allowing pollinators access to the flower) at the same time. When the female is ready, and this take a little while watching to see the differences in stages of blossom developement, again you remove the male flower, then go to you female flower and untape both. Do your fertilizing, and retape. Make sure you mark the fruitlet so that you know which one to pick for seeds. A large wide rubber band slipped over the fertilized blossom is probably on of the easiest to use and will not cut off circulation of nutrients to your fruit.
It probably seems redundant to prevent both blossoms types from being visited by bees or other insects, but you don't want to risk having stray pollen mixed with the pollen you wish to use for your cross. And bees, especially bumblebees and solitary bees love collecting pollen from the large yellow/orange blossoms. Lots of pollen and larger bloosoms (easy access), seem to intice the bees to the blossoms.
In a few weeks to a few months you squash or melon or cucumber will be ready for harvesting. Allow them to mature on the vine as long as possible and get fully ripe or in the case of melons, summer squash and cucumbers actually over ripe. Then harvest your fruit.
With melons, cucumbers and summer squash, split your fruit in half and scrap out your seeds into a large enough container that you can add a little water. Avoid as much flesh as you can while you are doing this. When you have harvested your seeds, add enough water that the goop can float about inch and a half to two inches above the bottom of your container. Allow the seeds to ferment 1-3 days at room temperature, stirring 3 or 4 times daily until the mature seeds start dropping to the bottom of the container. (Old canning sealer work wonderfully as you can see this happening.) The stir vigorously to release all the seeds from the goop, allow the mixture to rest for a half hour so the goop will float and then scrap it off and rinse your seeds a few times to ensure they are clean. Spread out on styrofoam plates and allow to dry completely. Then bag and label your fresh seeds.
Winter squash is handle slightly different, because they should be picked and stored at room temperature for a minimum of 2 weeks and preferably 6 weeks before you process them, to allow the rinds to cure. They also have the advantage that you can scrap out the seed cavity and then process the flesh for delicious dishes. When I scrap out the seed cavity, I manually go through the pulp and select only the plump full seeds with whatever flesh clings to them, and then ferment those seeds. Again you wash, dry. bag and label the clean seeds.

Friday, December 12, 2008

Saving Seeds - Part Six - Carrots

Saving carrot seeds takes a long time. Carrots are a biennial plant, which means that they will flower and set seed the second year. Hence the long time. If we want to save carrot seed, the first thing I do is make sure that there is no Queen Anne's Lace anywhere near my gardens. (QAL is a relative of the carrot and will cross quite easily.) Then the simple thing to do is in the fall before it gets really cold, but after the first frosts, is cut the carrot top to about 1 inch of the surface. (I generally leave a small patch of carrots of whatever variety that I am growing for seed the next year right in the garden near the end of one of the beds.) Then mulch the area quite thickly. Use enough mulch to keep the below ground portion of the carrot from freezing and turning to mush. In the very cold climates, this may take several bales of hay or straw to achieve the desired protection. The idea is to keep the carrots cool enough that they will not try to grow, yet warm enough that you do not rupture the cell membranes. If you are in a really cold climate, dig your carrots and bury in damp sand in a place that is just above freezing.

Come spring, make another check for Queen Anne's Lace and either remove it or remove the flowering buds before they open. (Check everyday if you leave it to flower later.) As soon as the last chance of frost has arrived remove your mulch and allow the carrots to form new tops. Thin your carrots so that they are a minimum of a foot apart in all directions, although 2 feet would better. I do this once I am sure which carrots are producing the best tops. Allow nature to take her course and in a couple of months the carrots will produce showy umbrels of white flowers which will set and produce lots of seeds. Once the flowers start to show a fade in color use fine tulle and twist ties or string and secure the umbrel (s) inside. Be generous with size of bag you make around the umbrel to allow it expand properly. After the seeds have matured and turned brown carefully cut the umbrel from the plant below where you have tied on the tulle.

Over a dish of some type (I use a styrofoam plate) turn the enclosed umbrel upside down and give it a shake to loosen the seeds from the plant. If you were to save the umbrels from just one or two plants you would have more than enough seeds (usually) to sow the average garden for years to come. Remember to put you freshly harvested seeds in a cool dry place for the longest viability.

Although I personally have never seen them, I have been told that at least one variety of carrots produce purple umbels. if any one know what variety (ies) do this please let me know.

Next time we will be discussing squash and melons.

Wednesday, December 10, 2008

Seed Saving - Part Five - Peas and Beans

Peas and beans have their reproductive parts enclosed so it very rare for them to cross naturally. However some bees like bumble bees have been know to help you along, so I would suggest that you plant different varieties several feet apart, as a precaution.

When collecting these two types of seeds, make sure that you allow the pods to mature and dry as much as possible on the vine. In fact if the weather will co-operate with you allow the pods to start cracking open before you harvest. Should the weather be helpful then save your most mature pods and finish drying them on screens in a warm dry place. When you shell the pea and bean seeds, select only those that are full, firm and plump for your saved seeds. After shelling allow them to dry completely (at least a week at room temperature) and select the best looking seeds (see the above) to store. The not so perfect ones make a great dried bean or pea soup.

Store in a cool dry place such as a paper bag in your fridge's crisper or in a cool room for a couple of weeks and then freeze and thaw (in the fridge) two or three times to kill any bugs that may have decide to hitch a ride in your seeds.

Once you have alternated the freezing, thawing cycle a couple of times the beans and peas may be stored in a cool, dry place if you are going to plant them in say the next 4-5 years. If you want to keep them longer than that I would suggest after the last thaw cycle, that you put them in a new paper bag, rolling it up tight to exclude as much air as possible, label, place in a glass canning sealer which contains about a 1/4 tsp. of desiccant and tighten down a glass and rubber band lid or a regular canning lid. Place in your fridge for 3 weeks to allow the final respiration slowing and evaporation of extra moisture, then pop your jar into a freezer at around 0F (-17.5 to -18C). Again when you go to retrieve your seeds from cold storage reverse the process. Put your seeds (the amount you are going to need plus 10%) in a new sealer without desiccant and thyme tea cotton ball (squeezed out) (to provide the start of the return of moisture to the seeds) back in the fridge for 2-3 weeks. Soak you seeds for about 15 minutes to jump start the seed absorbing moisture, then plant like always.

Next time we will be discussing saving carrot seeds.

Monday, December 8, 2008

Seed Saving - Part Four - Corn

Some types of plants must be saved by using isolation techniques. One of these is corn. You must use distance (about 1 mile), a timing differential, or a barrier method to prevent the pollen of one variety of corn from fertilizing another variety.
A timing differential is done by selecting varieties that will have pollen shed at different intervals. I would recommend at least a week between dates. To be absolutely sure that purity is achieved with this method, remove the tassels of the first variety about 2 days before the due date of pollen shed of the next variety. Take your hand sprayer and spray down the varieties vigorously as to wash any pollen that may be clinging to the plants. After a good rinse, gently shake the corn stalks to remove the water droplets from the first variety. Using a paper bag and either a twist tie, or rubber band, enclose the ears of the first variety you wish to save for seed. Alway select probably twice as many ears as you think you will need. The paper bag ensures that the following pollen sheds will not accidentally fertilize any unfertilized ovums of the previous corn varieties. If you carefully follow this routine you can grow several pure varieties each year. Once the corn kernels have been fertilized and the silks change color and start to dry back it is safe to remove the paper bags. Please make sure that you mark which ears you have protected and use those for you corn seed. It also helps to provide physical barriers to prevent pollen being carried in by the wind. Surround your garden by wind breaks, build breaks with plants such as beans or extremely tall tomatoes, or build screens out of lathes and plastic. These will help break the wind currents and aid in preventing airborne pollen.

Barrier method is achieved by enclosing your patch in a pollen proof barrier, such as a greenhouse. If you choose to do this, remember you must use an extremely fine filter on your intake for your airflow, so that you will prevent pollen laden air from being sucked in and blown over the awaiting pollen tubes ready to fertilize the ovum.

Isolation techniques is making sure that you are at least one mile from the nearest neighbor growing corn. If you live in the country and are a distance of more than a mile from other gardens, and you are growing only one variety of corn, you are probably safe to consider you corn kernels pure and non-hybrid.

Next time I will discuss peas and beans.

Wednesday, December 3, 2008

Seed Saving - Part Three

Seed saving really starts shortly before your transplants and seeds go in the ground. The first thing is to determine that you have an open pollinated variety of seed. Hybrids will not breed true to type. Then you must decide what methods you will be using to ensure pure seed if you wish to be able to grow the next generation, that is exactly like the one you are going to enjoy this year. There are several methods of obtaining pure seed. The first is to grow only one variety of any type of vegetable or flower. With only one variety of both pollen and ovum, you can only get the offspring of that particular variety.
If you plant to plant more than one variety of the same type of vegetable, then you are given several options with varying degrees of success, depending on which type you choose. Beans and peas are considered self fertilizing and rarely cross even with the help of pollinators, such as bumble bees. Tomatoes are also self fertilizing however, if you have bumblebees or orchard bees or solitary bees that are able to penetrate the anther cone you can and often do have cross pollination to some degree.
There are methods for getting around this however. The first is to bag the blossom (or blossom cluster), preventing the insects from approaching the flower. The second is to build a remay or screen cage which encloses the entire plant and again prevents pollinators from the flowers.
If you are willing to risk a 0-3% crossing (and this is as good as a lot of commercial seed growers will accept), then you select several batches of tomatoes for seeding (to lower your risk) or select tomatoes that were set when the pollinators aren't available. (In our locale this is between about the 2nd week of July until the end of July. The solitary and orchard bees are done for the year and the few bumblebees around here aren't in large enough numbers to be just pollen hunting during those weeks.)
Another way to lower your risk of cross pollination is to separate your varieties by at least 10 - 20 feet. Bees are like the rest of us, they do not want to work any harder than they have to.
A third way to reduce cross pollination and preserve your heirloom varieties (or heritage or open pollinated), is to plant 4 plants of the same variety close together and select your seed tomatoes from those that are found in the center of the plants. Again it is much less likely for pollinators to get to blossoms, before the tomatoes set themselves.
For those plants that are not considered self fertile, the only method of ensuring pure seed is some form of isolation and then doing the cross yourself. The pollen can be collected using an artist's paint brush or q-tip and then applied to a selected isolated flower when it is ready to be pollinated. It is best to collect the pollen just before doing the crossing.
Although it is more labor intensive, if you do the proper isolation of blossoms you are able to save more seeds from more varieties of plants in a much smaller area.
One final note. Make sure you mark each of your chosen "fruit" so that when it comes time to harvest and save seeds, you will be sure to save from right ones.

Monday, December 1, 2008

Seed Saving - Part Two


Cold Storage for Seed
This is a prolonged method for saving seeds. Most of the information I give here is a home modification of what the Kew Gardens explained a couple of years ago. The best way to save seeds is for long storage is to place them in sealed glass vials. However since the average householder doesn't have access to glass tubing and a bunsen burner, the second best was suggested to be a glass container sealed with a rubber stopper. This is much easier as almost anyone can obtain rubber stoppered test tubes and this is what we use, for smaller seeds.


First one must have clean seeds dried to room humidity. One should check for viablity at this point. Place a very small amount of desiccant in the bottom of the test tube and block with a wad of paper (keeps the desiccant off the seeds but allow the moisture to seep across to the wad). Place a label on the inside of the tube. This will ensure that you will not lose the label or the information on it once it is in storage. Add your seed. Stopper tightly. Place seeds in your fridge for period of 3 weeks, where the seed will go into a "dormant" state, losing more excess moisture and slowing down the respiration rate. Once the seeds have this conditioning they are ready to place in the deep freeze at -18C.Grunt has made me several boxes, about 9"x9" with shallow holes in the bottom that will hold 100 test tubes.

We add a list to each box of seed giving the position of each tube of seeds and also keep 2 master lists (one of each box and one of all the varieties saved). This is done both by hard copy and on the computer.

For larger seeds, such as corn or beans, one can place desiccant (1/2 tsp.) in the bottom of a canning jar (1 or 2 quart or 1 or 2 litre). Place your seeds in a paper bag, roll up securely, tie shut. Place the bag inside the jar and use either a sealing lid or glass lid plus rubber ring and metal sealer ring. Treat seeds the same way, with a 3 week stint in the fridge.

When you go to recover your seeds remember to reverse the conditioning step except you place them in a test tube without desiccant. Also you can place a small cotton ball soaked in thyme tea inside the rubber stopper. Use thyme tea as it contains natural antibiotic and antifungal properties. Remember to squeeze out all excess moisture and replace the cotton ball every 2 to 3 days. After reconditioning, it also helps to soak the seeds in water for 15 minutes to an hour before sowing.

Friday, November 28, 2008

Seed Saving - Part One

Seed Saving is a large part of many gardener's yearly chores. It probably would be a "chore" for more people if they just realized how easy it really is, for most types of seeds. In this section of our blog, I will be dealing only with those seeds that the average vegetable or flower gardener will encounter, and not those which require special treatment such as water plants. For the ease of understanding, I will refer to the following conditions. 1. when seed is first harvested the germination rate is 95% or higher, and 2. prolonged storage germination rate will remain above 74.9% (this is what several commercial seed companies deem as acceptable for selling).
The first thing to realize is that there are three types of seed storage, room temperature, cool storage and cold storage. Each has its own advantages and disadvantages.
-Room temperature, which is as the name says, is keeping seeds at room temperature. It is preferable, to keep the seeds in a cool room such as a cold room, or basement or at least a room that can be kept below 70F. This is shortest term for storage and result in a fairly short term viability for most seeds. The advantage here is that there is no need for any special equipment or conditions to maintain your seeds. T
-Cool Storage temperature - this is where seed is stored in the fridge at around 4C. It will prolong seed viability for several times the amount of time that room temperature storage gives. Tomato seeds should remain viable for at least 10 years. Net result - longer storage of viable seeds but offset by the amount of fridge space required.
-Cold Storage temperature - this is the longest storage alternative, where after conditioning seeds are held at about -18C in the deep freeze. They will last a very long time this way, but require more time and expense to prepare and store.

Let us deal with Room Temperature storage. Requirements are a cool area, a storage container of some type, collection containers (ie coin envelopes, baggies, regular envelopes, film canisters, ect., anything that will keep your seeds together and that you can label.)
Always collect your seeds when they are mature enough to grow an offspring. For most plants, this is when the seed has fully formed, the fruiting body is ripe, and there is a distinct change in color in the seeds (often going from green to brown or black). Of course there are exceptions such as tomatoes, where once the gel has fully formed around the seeds and tomato fruit has started to change color, the seeds are viable.
Prepare your seeds, by making sure they are dry, especially if you are using a moisture tight container such as a baggy or film canister. Once they feel dry (an added precaution to help make sure that they are dry enough is to wrap the seeds in a paper towel, which will blot up any excess moisture.), you slip them into you selected collection container which you will label. I would suggest that you include the name of the seed, varietal name if known, date harvested and any special treatment that the seed may need to get it to germinate. Once labelled, and filled just tuck you collection container into your storage container.

Cool Storage - basically the same requirements as Room Temperature Storage, except that you will also need a compartment in you fridge. (I use one of the crisper sections.) This type of storage requires you to make sure that your seeds are dry. If in doubt, dry for a longer period of time or add a drying agent to your container of seeds. A quick common solution is to wrap up table salt into 5 or 6 layers of paper towel, or some dry rice grains done the same way. If you are going to get into seed saving in a larger way, talk to you druggist or florist and see if you can get some desiccant Wrap a very small amount in a paper towel and tuck in with your seeds. Either right in the collection container if using a moisture proof one or in your storage container if using a paper container such as an envelope.

We will go to Cold Storage next time.

REMEMBER : all the methods I have or will discuss are only modifications of other people's methods. Most storage methods have been used in various forms for years, and I can only discuss what we do. If it sounds familiar, it is only our modification of what others have done. If I know the source of information I will direct you to the person or organization which started me down that particular path.